Background:
Now that vSphere 8.0 is GA, I have upgraded the Humbled Geeks lab for us to see the new features in action and familiarize ourselves with the new look!
I took screenshots along the way to share how the upgrade was done. Specifically, this post will detail the steps needed to upgrade our existing vCenter Server 7.0u3 appliance to vCenter Server 8.0, non-disruptively.
Disclaimer:
I am documenting the procedure of upgrading our lab for educational purposes. If you attempt to follow these procedures in your environment, ensure that you have backups of your existing appliance(s) and proceed with caution.
Getting Started:
Before you get started, I strongly recommend you check the VMware Product Interoperability Matrix to validate compatibility with other VMware products in your environment; i.e., VMware NSX-T.
To upgrade vCenter Server Appliance (VCSA) from version 6.5 or older, you must first upgrade to version 6.7 or 7.0, and then upgrade to version 8.0. This may also be found on the Upgrade Path tab of the VMware Product Interoperability Matrix.
After validating our VMware products are compatible with vCenter Server 8.0, I was ready to get started!
Download VMware vCenter Binary:

– Navigate to Products and Accounts > All Products.


– I used PowerShell’s Get-FileHash cmdlet.
Stage 1 – Upgrade vCenter Server Appliance to 8.0:


– I will be connecting to the existing vCenter Server to allow for advanced features that will be demonstrating later in this post.

– SSO credentials for the existing VCSA.
– FQDN of Existing VCSA.
– Scroll down to continue.

– Click “NEXT“.


– Click “NEXT“.


– This is one of the advanced features that is only available when connecting to the an existing VCSA.


– I will be re-naming the new VCSA to the name currently used, and will temporarily append “.NEW” to the new VCSA.


– Check the “Enable Thin Disk Mode” checkbox.
– Click “NEXT“.

– This is another advanced feature made available when connecting to an existing VCSA. If you had vDS in your environment, you would be able to select that, otherwise you would have to create an “ephemeral” port group.

– Click “NEXT“.
– When I get to Stage 2 of the upgrade, I will take over the IP address of the existing VCSA.


Stage 2 – Upgrade vCenter Server Appliance to 8.0:
Note: Be sure that DRS is disabled.


– None of these items require resolution in our lab environment.
– Click “CLOSE“.

– Since this is our lab environment, I am only selecting “Configuration and inventory“.
– Click “NEXT“.

– Click “NEXT“.

– Click “FINISH“.


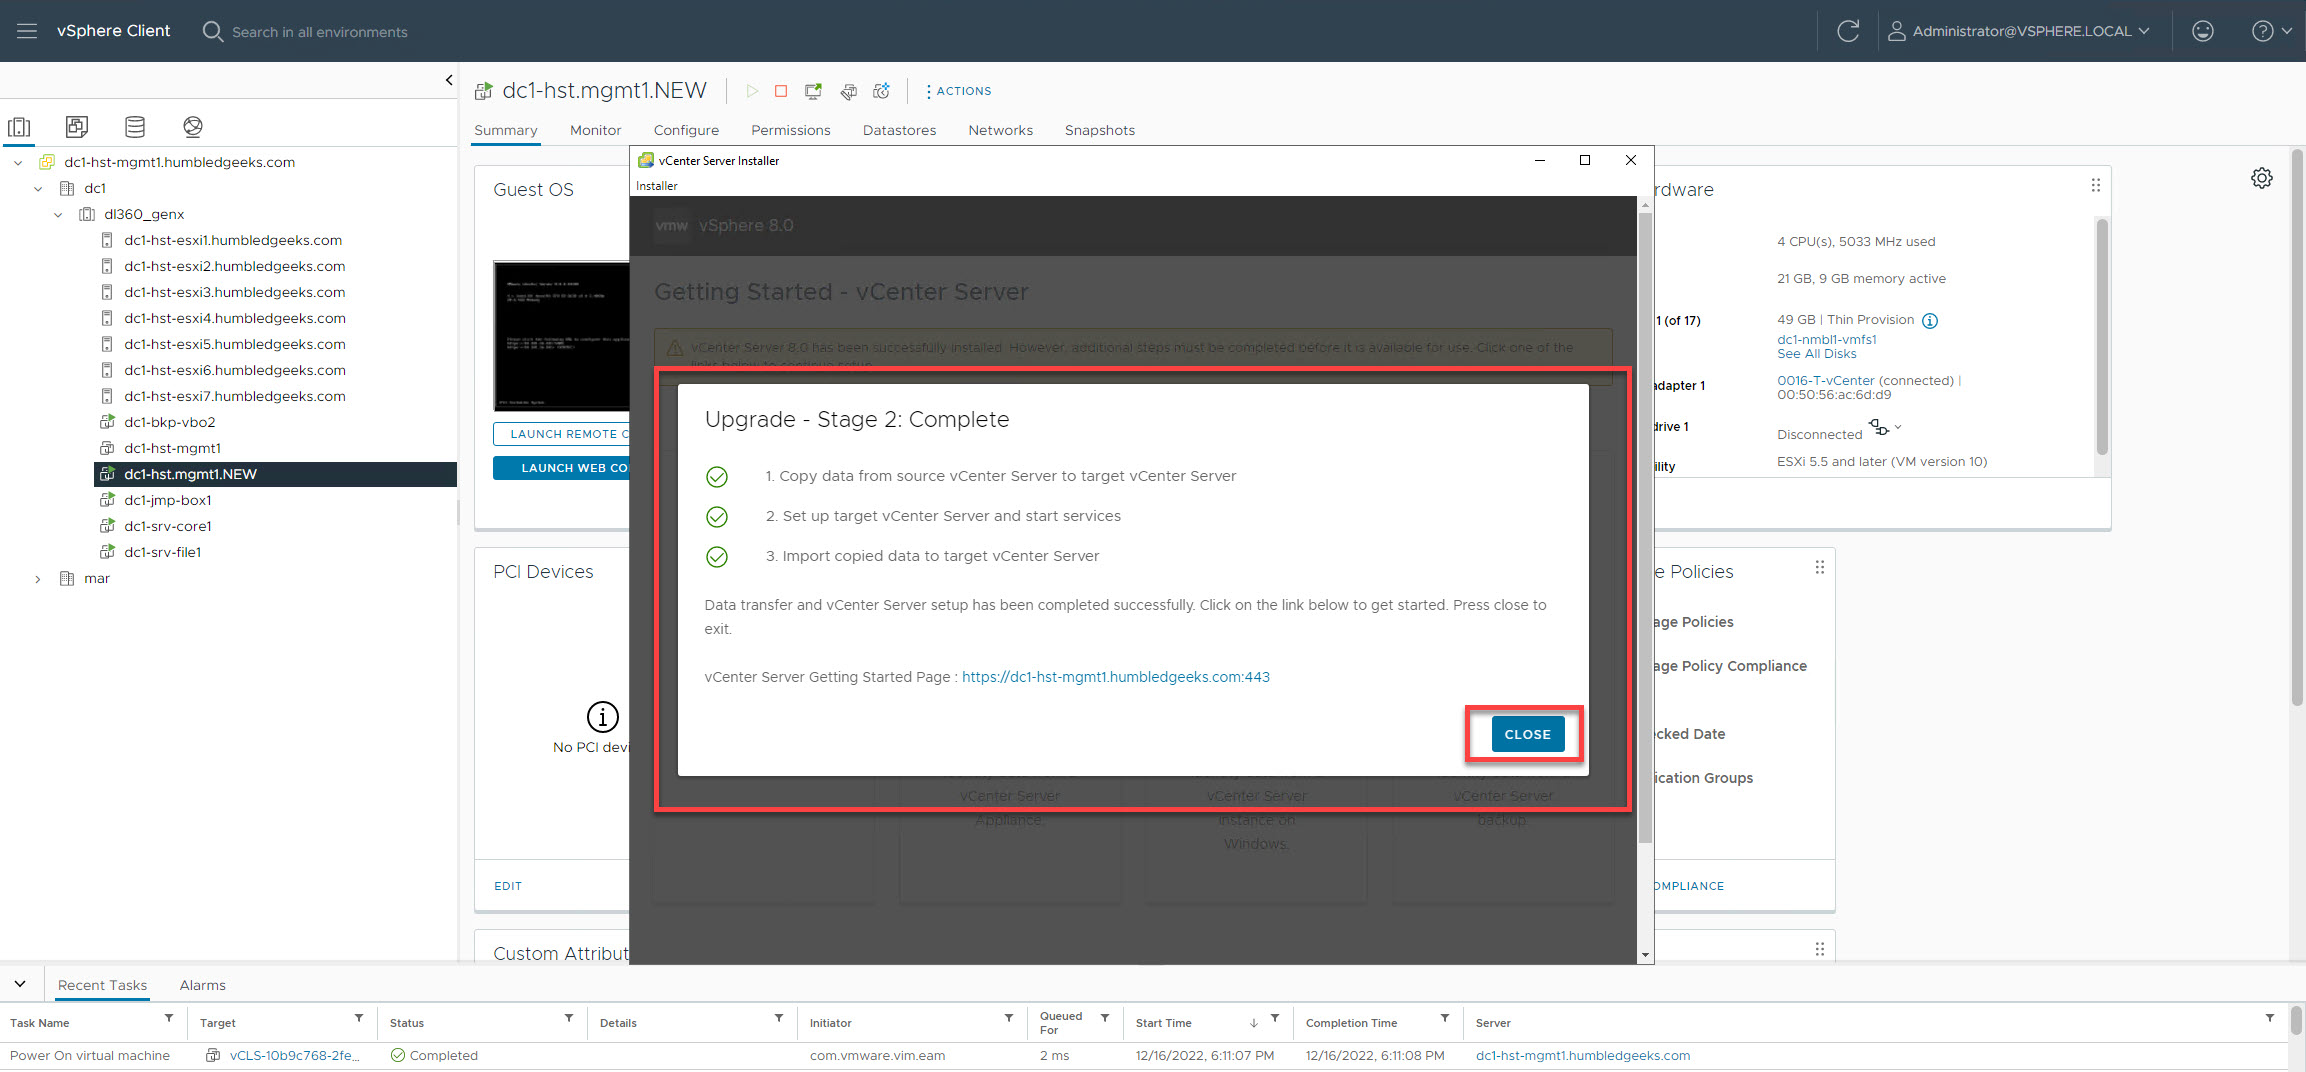
– Close out any browser sessions to the existing VCSA.
– Open a new browser session to login to the new VCSA.

Renaming New vCenter Server Appliance:
Since this is a lab environment and we have the existing VCSA backed up, I can safely delete the former VCSA. In a production environment, I may keep the former VCSA for a short period of time just in case.
Once the former VCSA has been deleted, I can rename the new VCSA to our naming standard and perform a Storage vMotion to update folder structure.


– Click “NEXT“.

– Click “NEXT“.


Next Steps:
At this point, we can start upgrading our managed ESXi hosts. In our next blog post, we will be demonstrating how to use LifeCycle Manager to automate the ESXi upgrade of our hosts.